W3cubDocs
/AngularFirst Angular app lesson 12 - Adding a form to your Angular app
This tutorial lesson demonstrates how to add a form that collects user data to an Angular app. This lesson starts with a functional Angular app and shows how to add a form it.
The data that the form collects is sent only to the app's service, which writes it to the browser's console. Using a REST API to send and receive the form's data is not covered in this lesson.
Time required: expect to spend about 20 minutes to complete this lesson.
Before you start
This lesson starts with the code from the previous lesson, so you can:
- Use the code that you created in Lesson 11 in your integrated development environment (IDE).
- Start with the code example from the previous lesson. Choose the from Lesson 11 where you can:
- Use the live example in StackBlitz, where the StackBlitz interface is your IDE.
- Use the download example and open it in your IDE.
If you haven't reviewed the introduction, visit the Introduction to Angular tutorial to make sure you have everything you need to complete this lesson.
If you have any trouble during this lesson, you can review the completed code for this lesson, in the live example for this lesson.
After you finish
- Your app has a form into which users can enter data that is sent to your app's service.
- The service writes the data from the form to the browser's console.
Lesson steps
Perform these steps on the app code in your IDE.
Step 1 - Add a method to send form data
This step adds a method to your app's service that receives the form data to send to the data's destination. In this example, the method writes the data from the form to the browser's console log.
In the Edit pane of your IDE:
-
In
src/app/housing.service.ts, inside theHousingServiceclass, paste this method at the bottom of the class definition.submitApplication(firstName: string, lastName: string, email: string) { console.log(`Homes application received: firstName: ${firstName}, lastName: ${lastName}, email: ${email}.`); } -
Confirm that the app builds without error. Correct any errors before you continue to the next step.
Step 2 - Add the form functions to the details page
This step adds the code to the details page that handles the form interactions.
In the Edit pane of your IDE, in src/app/details/details.component.ts:
-
After the
importstatements at the top of the file, add the following code to import the Angular form classes.import { FormControl, FormGroup, ReactiveFormsModule } from '@angular/forms'; -
In the
DetailsComponentdecorator metadata, update theimportsproperty with the following code:imports: [ CommonModule, ReactiveFormsModule ],
-
In the
DetailsComponentclass, before theconstructor()method, add the following code to create the form object.applyForm = new FormGroup({ firstName: new FormControl(''), lastName: new FormControl(''), email: new FormControl('') });In Angular,
FormGroupandFormControlare types that enable you to build forms. TheFormControltype can provide a default value and shape the form data. In this examplefirstNameis astringand the default value is empty string. -
In the
DetailsComponentclass, after theconstructor()method, add the following code to handle the Apply now click.submitApplication() { this.housingService.submitApplication( this.applyForm.value.firstName ?? '', this.applyForm.value.lastName ?? '', this.applyForm.value.email ?? '' ); }This button does not exist yet - you will add it in the next step. In the above code, the
FormControls may returnnull. This code uses the nullish coalescing operator to default to empty string if the value isnull. -
Confirm that the app builds without error. Correct any errors before you continue to the next step.
Step 3 - Add the form's markup to the details page
This step adds the markup to the details page that displays the form.
In the Edit pane of your IDE, in src/app/details/details.component.ts:
-
In the
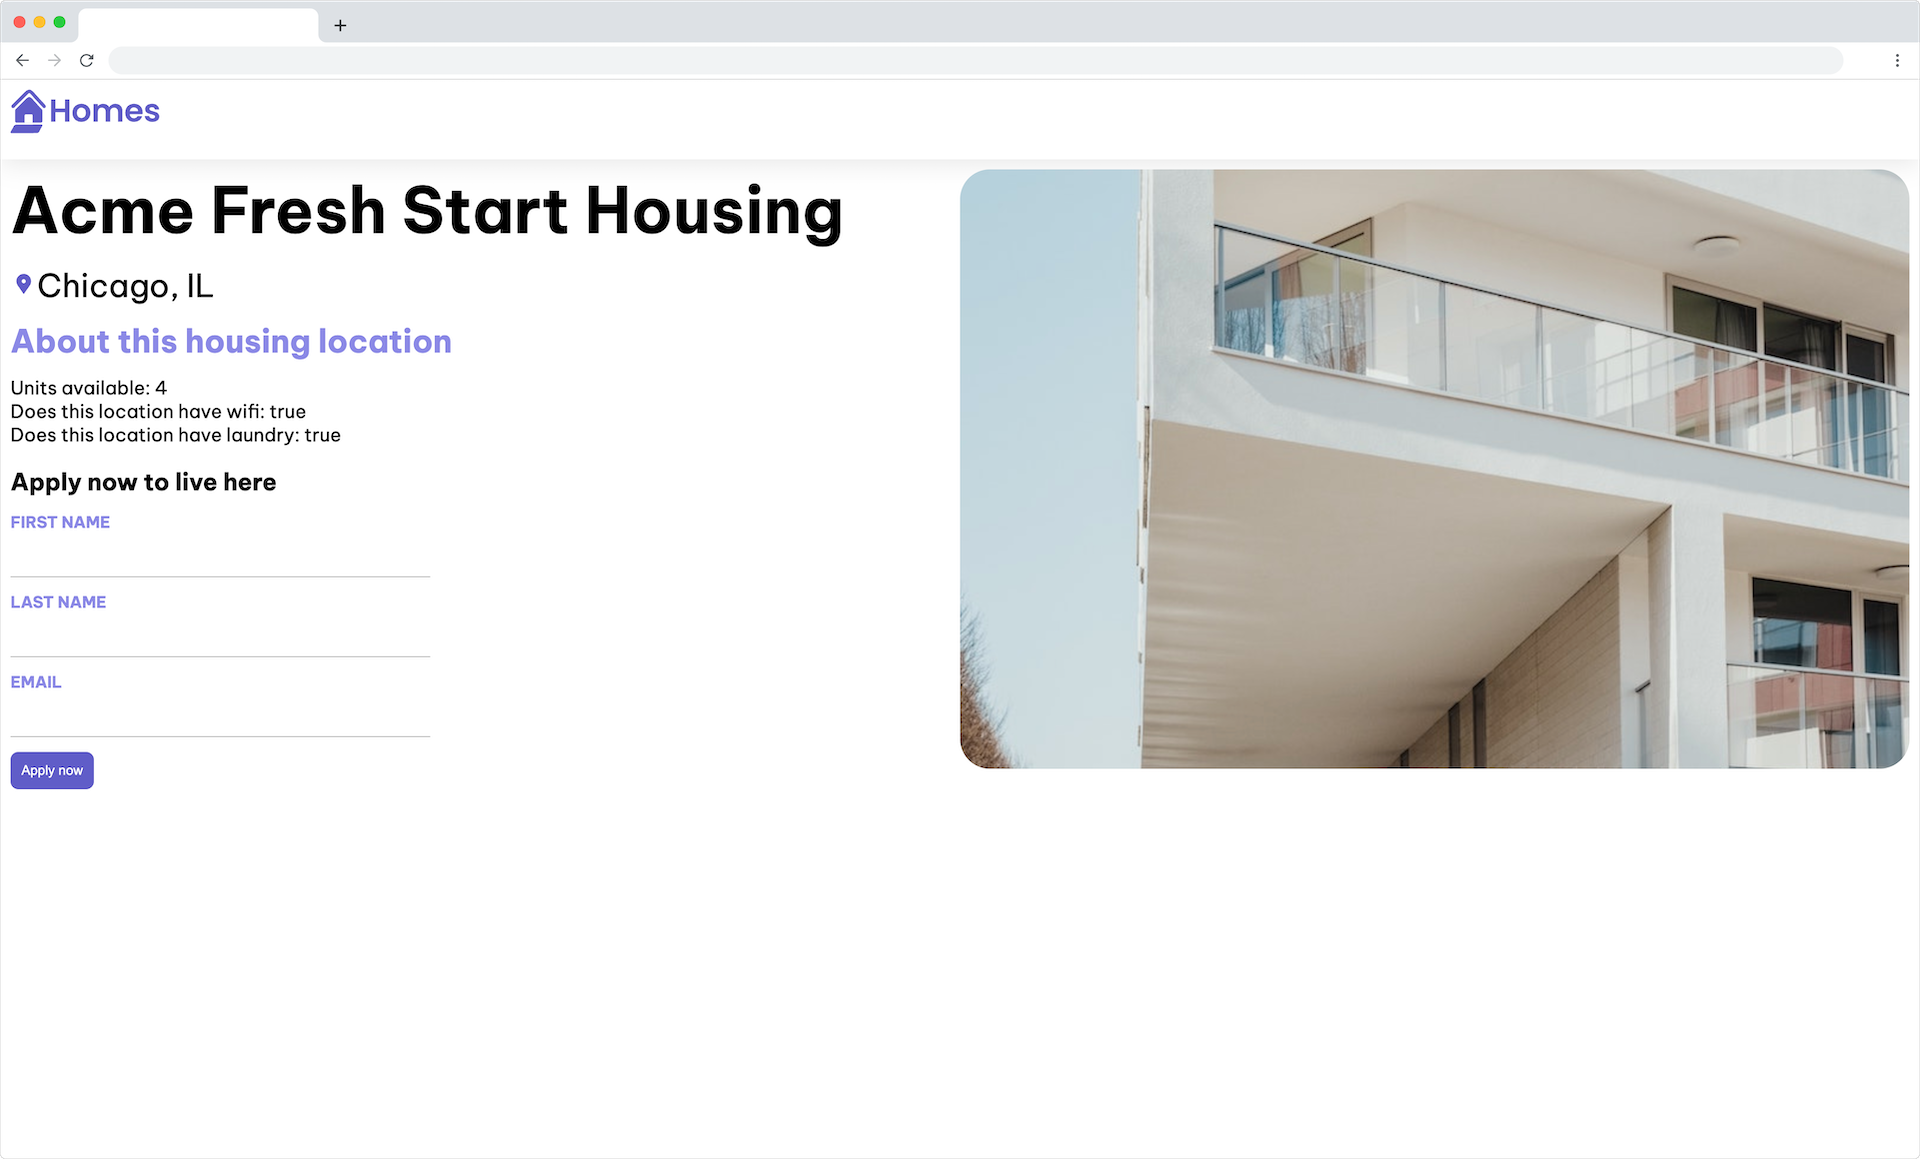
DetailsComponentdecorator metadata, update thetemplateHTML to match the following code to add the form's markup.template: ` <article> <img class="listing-photo" [src]="housingLocation?.photo" alt="Exterior photo of {{housingLocation?.name}}"/> <section class="listing-description"> <h2 class="listing-heading">{{housingLocation?.name}}</h2> <p class="listing-location">{{housingLocation?.city}}, {{housingLocation?.state}}</p> </section> <section class="listing-features"> <h2 class="section-heading">About this housing location</h2> <ul> <li>Units available: {{housingLocation?.availableUnits}}</li> <li>Does this location have wifi: {{housingLocation?.wifi}}</li> <li>Does this location have laundry: {{housingLocation?.laundry}}</li> </ul> </section> <section class="listing-apply"> <h2 class="section-heading">Apply now to live here</h2> <form [formGroup]="applyForm" (submit)="submitApplication()"> <label for="first-name">First Name</label> <input id="first-name" type="text" formControlName="firstName"> <label for="last-name">Last Name</label> <input id="last-name" type="text" formControlName="lastName"> <label for="email">Email</label> <input id="email" type="email" formControlName="email"> <button type="submit" class="primary">Apply now</button> </form> </section> </article> `,The template now includes an event handler
(submit)="submitApplication()". Angular uses parentheses syntax around the event name to create define events in the template code. The code on the right hand side of the equals sign is the code that should be executed when this event is triggered. You can bind to browser events and custom events. -
Confirm that the app builds without error. Correct any errors before you continue to the next step.
Step 4 - Test your app's new form
This step tests the new form to see that when the form data is submitted to the app, the form data appears in the console log.
- In the Terminal pane of your IDE, run
ng serve, if it isn't already running. - In your browser, open your app at
http://localhost:4200. - In your app, right click in the app and from the context menu, choose Inspect.
- In the developer tools window, choose the Console tab. Make sure that the developer tools window is visible for the next steps
- In your app:
- Select a housing location and click Learn more, to see details about the house.
- In the house's details page, scroll to the bottom to find the new form.
- Enter data into the form's fields - any data is fine.
- Choose Apply now to submit the data.
- In the developer tools window, review the log output to find your form data.
Lesson review
In this lesson, you updated your app to:
- add a form using Angular's forms feature
- connect the data captured in the form to a form using an event handler
If you are having any trouble with this lesson, you can review the completed code for it in the live example.
Next steps
More information
For more information about the topics covered in this lesson, visit:
© 2010–2023 Google, Inc.
Licensed under the Creative Commons Attribution License 4.0.
https://angular.io/tutorial/first-app/first-app-lesson-12