W3cubDocs
/AngularLesson 7 - Add an interpolation to a component’s template
This tutorial lesson demonstrates how to add interpolation to Angular templates in order to display dynamic data in a template.
Time required: expect to spend about 10 minutes to complete this lesson.
Before you start
This lesson starts with the code from the previous lesson, so you can:
- Use the code that you created in Lesson 6 in your integrated development environment (IDE).
- Start with the code example from the previous lesson. Choose the from Lesson 6 where you can:
- Use the live example in StackBlitz, where the StackBlitz interface is your IDE.
- Use the download example and open it in your IDE.
If you haven't reviewed the introduction, visit the Introduction to Angular tutorial to make sure you have everything you need to complete this lesson.
If you have any trouble during this lesson, you can review the completed code for this lesson, in the live example for this lesson.
After you finish
- Your app will display interpolated values in the
HousingLocationComponenttemplate. - Your app will render a housing location data to the browser.
Conceptual preview of interpolation
In lesson 6, you added data binding to the template to enable developers to pass data from the HomeComponent to the HousingLocationComponent. The next step is to display values (properties and Input values) in a template. In order to accomplish this task you have to use interpolation.
The Angular template syntax supports mixing static template content with dynamic values and expressions.
Using the {{ expression }} in Angular templates, you can render values from properties, Inputs and valid JavaScript expressions.
For a more in depth explanation, please refer to the Displaying values with interpolation guide.
Lesson steps
Perform these steps on the app code in your IDE.
Step 1 - Update HousingLocationComponent template to include interpolated values
This step adds new HTML structure and interpolated values in the HousingLocationComponent template.
In the code editor:
-
Navigate to
src/app/housing-location/housing-location.component.ts -
In the template property of the
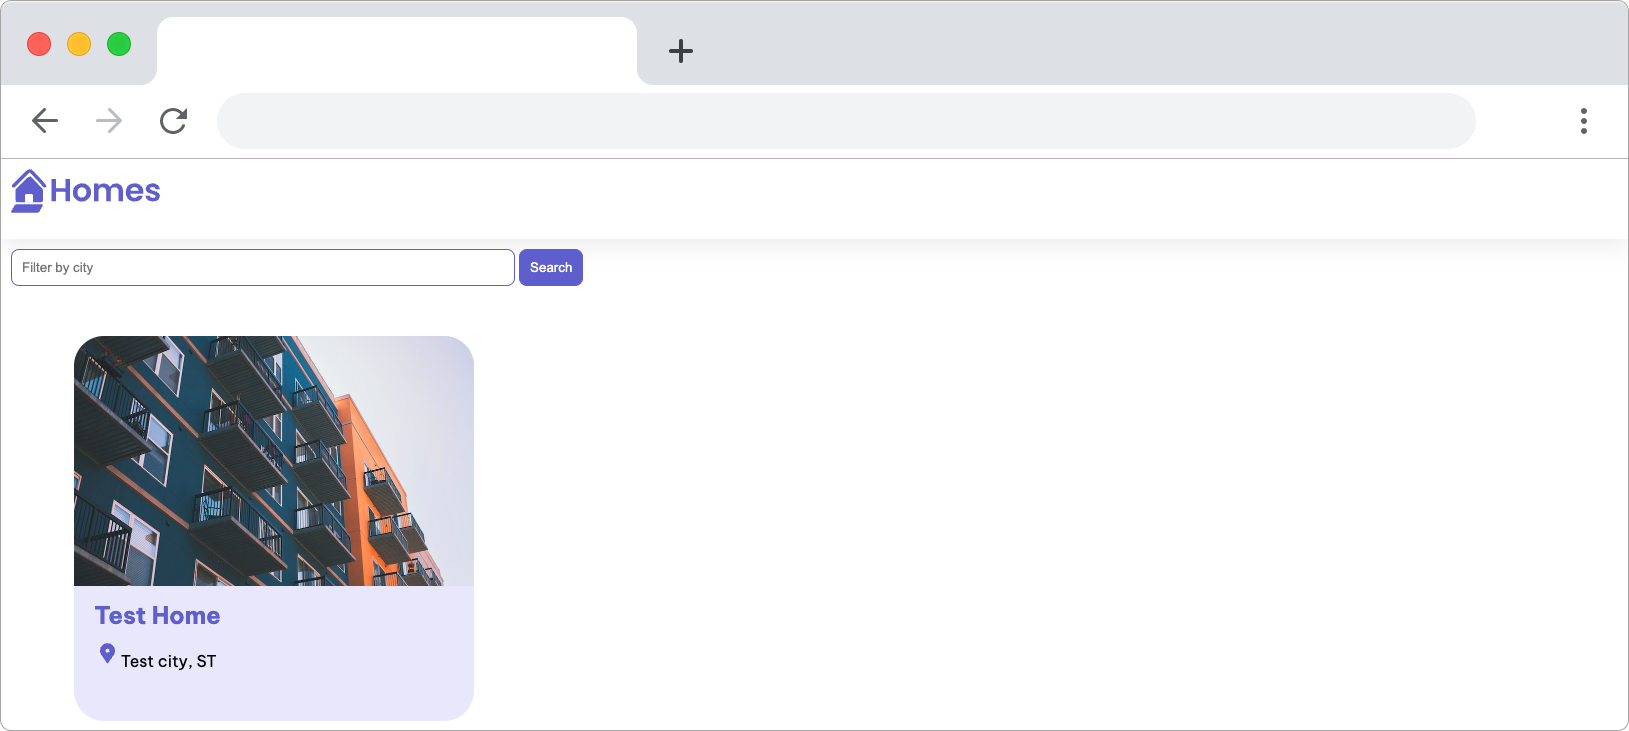
@Componentdecorator, replace the existing HTML markup with the following code:template: ` <section class="listing"> <img class="listing-photo" [src]="housingLocation.photo" alt="Exterior photo of {{housingLocation.name}}"> <h2 class="listing-heading">{{ housingLocation.name }}</h2> <p class="listing-location">{{ housingLocation.city}}, {{housingLocation.state }}</p> </section> `,In this updated template code you have used property binding to bind the
housingLocation.phototo thesrcattribute. Thealtattribute uses interpolation to give more context to the alt text of the image.You use interpolation to include the values for name, city and state of the
housingLocationproperty.
Step 2 - Confirm the changes render in the browser
- Save all changes.
- Open the browser can confirm that the app renders the photo, city and state sample data.
Lesson review
In this lesson, you added a new HTML structure and used Angular template syntax to render values in the HousingLocation template. Now, you have two important skills:
- passing data to components
- Interpolating values into a template
With these skills, your app can now share data and display dynamic values in the browser. Great work so far.
If you are having any trouble with this lesson, you can review the completed code for it in the live example.
Next steps
For more information about the topics covered in this lesson, visit:
© 2010–2023 Google, Inc.
Licensed under the Creative Commons Attribution License 4.0.
https://angular.io/tutorial/first-app/first-app-lesson-07